
s/n 003256
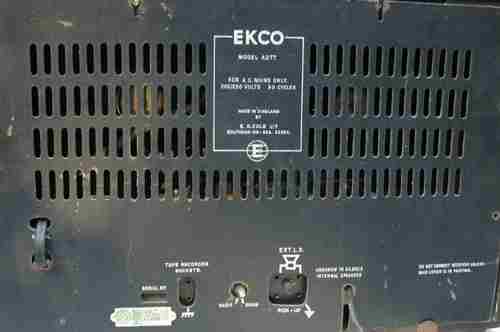
Ekco A277 200-250V AC mains operated single band VHF radio 87.5-100 MHz incorporating two loudspeakers and tuning indicator. Valve lineup: ECC85, EF89, EF89, EABC80, EL84, EZ80 and EM80.
The original cost of the set when introduced in July 1956 was Ł 23.8s.4d plus purchase tax. This set is electrically the same as the Ekco models C273 and A274 but is housed in a more expensive cabinet. FM broadcasting on VHF in the UK commenced in May 1955, though experimental transmissions by the BBC had been broadcast since 1950. Early VHF sets of this period generally also included long and medium wavebands and were usually designated AM/FM radios.
I saw this sorry looking radio in a junk shop Horncastle, Lincolnshire. The back was loose so I was able to see that it was complete apart from a missing knob at the rear. I was attracted to it, despite the peeling veneer and scratched exterior because it was an early VHF only model and, I thought, reasonably priced at Ł10
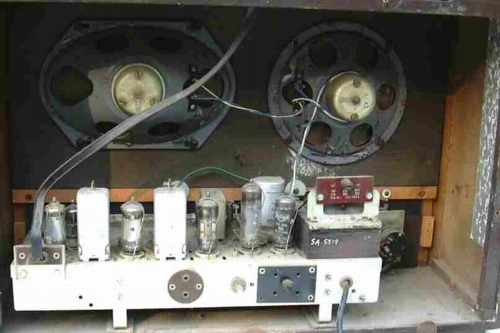
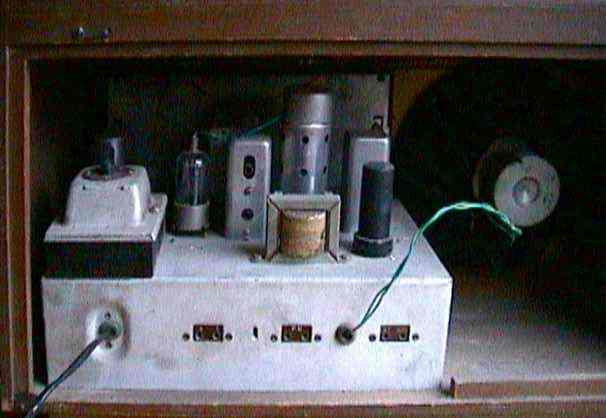
As this view of the interior shows it had been poorly stored for some considerable time, paint had peeled from the loudspeakers, the aluminium foil dipole aerial was corroded and the chassis was covered in black corrosion spots
Recalcitrant Knobs. I managed to remove the grub screw from one knob but I could not remove it from the shaft. The screws for the other two were well rusted and I applied WD40 but was not able to turn them. Part of the problem is that the knobs are set back from the front of the set so it is difficult to get a screwdriver into the screws and even if I did I guessed the knobs would stubbornly remain in place so I removed the chassis complete with dial glass. There are six wood screws and copper clips which hold the glass in place. I had to manufacture a screwdriver with a right angle bar to access the lower dial retaining wood screws. After all this effort I still was unable to remove the knobs so sought advice on http://www.vintage-radio.net/. Here are some suggestions that might work for you in similar circumstances.
Steve J says:"The A277 is the posher version of the A274, of which I have two. Once the grub screws are removed, there is nothing else holding the knobs on. Just have to pull harder!"
Graham says: "The trouble with WD40 is that it tends to evaporate. You could try other penetrating fluids such as penetrating oil, diesel fuel or brake fluid. The last two are pretty nasty, so don't do it in the house and make sure the liquid doesn't spread and dissolve something else. You can build up little dams using plasticine. Put some fluid down the hole in the knob which you removed the screw from and leave to soak.
If one half of a grub screw head shears off it is sometimes possible to file a step on the end of a piece of steel rod to match. Then by applying axial pressure and rotation the screw can be made to turn.
Alternatively solder a piece of brass rod to the remains of the screw, filing a step on the end if necessary. The way to do this is to heavily tin the end of the rod with solder. Daub the end of the rod with flux and apply to the grub screw. Now use a flame or a large soldering iron to heat the rod. Obviously keep any flame well back from the set. Don't use too much solder or you'll solder the grub screw into the knob. Bend the rod and you can generally turn the screw out. This has worked for me several times.
As a "last resort" you could destroy the knob by cutting it up with a piece of hacksaw blade with a square, not rounded, end held in an eclipse pad saw handle. You can then saw length ways along the knob's brass insert until the cut almost reaches the shaft. Insert a screwdriver in the saw cut and twist it. This should enable the insert to be removed.
Another possibility, if there is access through the bottom of the cabinet, is to sacrifice a pot by sawing off the shaft close to it. The shaft and knob can then be held in a vice while the screw is drilled out. Re tap the knob for a larger screw, or drill and tap another hole in another position.
If I remove grub screws I replace them with new steel ones having internal hexagons. It's impossible to destroy these as long as you use the correct size hex key.
You should use a screwdriver which fits the slot in the screw as closely as possible. The end and corners of the blade should be flat and not rounded off. If necessary touch up the blade on a grinder. It may also help to put a suitable piece of wood under the knob to prevent the shaft from bending as you try to remove the screw. Tapping the screwdriver into the slot with a light hammer can also help. As suggested turning the knob past its limits can also help. It may be possible to prevent the shaft from rotating with a small pair of mole grips. You could use a spanner on hex knobs, or use a loop of string as a chain wrench on round knobs. "
Christopher Capener says: "Another way a knob may be removed is to turn it until it reaches its limit and then try forcing it further, then turn the other way and do the same. This can loosen some knobs especially push on ones but may damage the pot. Once I have a knob off I sometimes clean the shaft and brass insert and then apply a tiny amount of light oil to prevent it sticking again."
Dave says:"I can relate to Graham's experiences with knobs with brass bushes, the brass seems to chemically react and bond the two together. I always put a thin film of light grease on all shafts when restoring just in case although it must have taken years for this to occur. Apart from multiple drive cord sets seized knobs and broken grub screws are my worst nightmare."
Quantum says "When dealing with knobs which refused to budge Smithy the Serviceman (of Radio Constructor fame) suggested winding the hem of a handkerchief around the base of the knob and wrap it round, and then gently pull on the handkerchief applying more pressure until the knob starts to move. However, when I've tried this I just tore the handkerchief!"
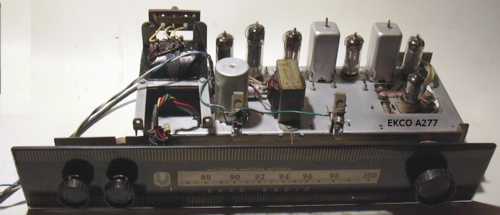
As can be seen From the above picture of the chassis, none of the least drastic suggestions worked!
Having removed the chassis and blown an brushed away the dust I was able to inspect the set. Although this radio was introduced in July 1956, the underside of the cabinet is clearly dated 29 MAY 476 and has an blurred circular stamp which I think reads KB&B.Ltd. The two loudspeakers are manufactured by Elac and made in England though the cone of the round one is made in Germany and marked IV56J. The round speaker also has the following numbers 6/42 and D106267. The elliptical one is marked 59/06 and D106277. These markings seem to indicate that this may have been one of the earliest sets of this model and manufactured before there was widespread coverage of the FM band which occurred in late 1956.(If you know how to decode these numbers please let me know.)
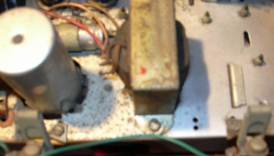
This blurred picture shows how the surface of the chassis was corroded and how after cleaning and the application of a silver coloured paste used for renovating picture frames applied with a small stiff bristle oil painting brush. In UK this is called Goldfinger and manufactured by Rowney. I used this for the first time on this set.
The electrolytic HT smoothing capacitors appeared to be well enough to try the set so after attaching a mains plug I energised it in series with a 60 watt light bulb and it worked, though it was clear that I needed to replace the dial lamps (almost completely black) and clean the valve pins and valve holders. After this was done it was left running on full voltage for several hours and apart from a slight hum seems to function well.
As can be seen from the picture at the top of the page the cabinet was in a poor condition but after some work it is now more presentable.