Ferguson Digital Radio FRG-R121D
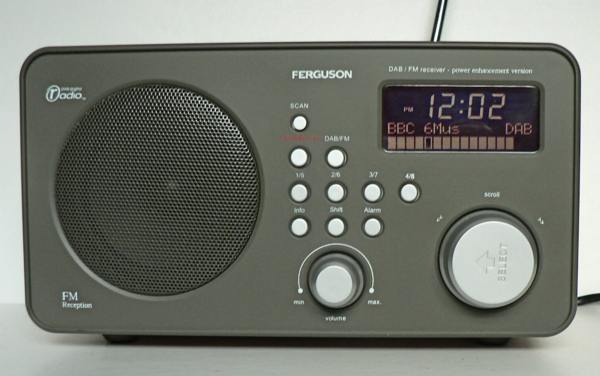
Ferguson FRG-R121D This is a
FM/DAB mains operated radio. This is one of several radios which
belonged to the late Esme Allan. When I received it the sound output
was atrocious! I discovered that an earphone or speaker plugged into
the sockets on the rear gave an acceptable distortion free output. On
opening the case I immediately found two faults as detailed below the
following two photos. The problem seemed to stem from the loudspeaker
itself. The output was fine when I substituted a replacement 8 ohm
speaker and also when I applied gentle pressure to the cone of the
speaker fitted I was able to reduce the distortion. I discovered that
the cone had been glued slightly off centre and by carefully working
with a craft knife I was able to release the cone and found that the
distortion was gone. The cone was glued back in position and the
speaker
fitted back in the case and care was taken during reassembly to ensure
that the punctured ribbon cable was kept out of the way of the fixing
screw! Made in China 2007. working.
Instruction
manual can be downloaded here (www.partmaster.co.uk/company/partmaster/manuals/Ferguson%20FRGR121D.pdf)
Specification and details
Supply voltage 230volts AC 50Hz only
Output power 4 Watts
Loudspeaker 4 inch diameter
Frequency coverage: FM 87.5 - 108 MHz DAB 174.928 - 239.200 MHz
Up to eight FM and eight DAB stations can be preset and selected by the
buttons on the front panel
On the rear there is a 3.5mm socket for headphone output (loudspeaker
muted when jack inserted) and another for an external speaker. There
are also two audio line output RCA sockets for connection to an
external amplifier.
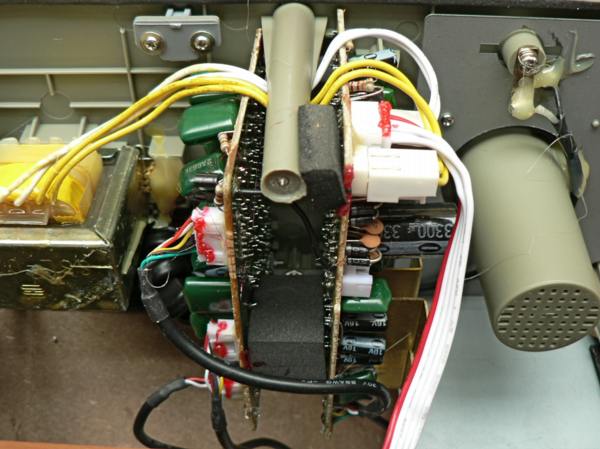
Close up view of inside of the back panel
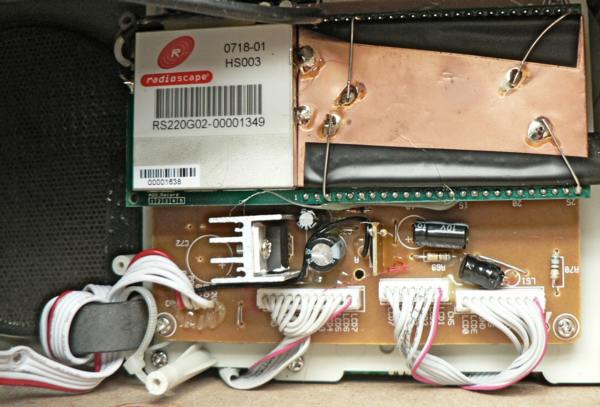
Close up view of rear of front panel
Note how a retaining screw has penetrated the ribbon cable on the left of this view. A surplus loose screw was found wedged between the components on this board.
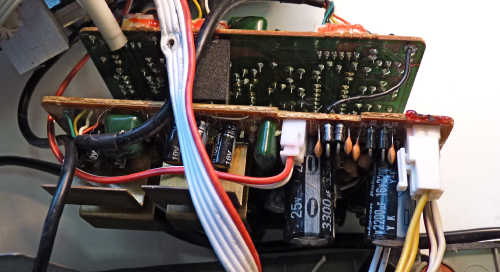
Hum
Gradually over a period of time a background hum has become apparent.
This is due to the gradual drying out of electrolyte in one or more of
the on board capacitors. [see the picture below] So here is how to
replace them:
1.Remove all the screws from the back of the set and the one on the
underside.
2.Twist and slide the front portion of the radio through the wooden
case with all the interconnections in place.
3.Remove the two screws holding the two circuit boards to the back
panel.
4.Remove the two screws which hold the board which is connected to the
power supply transformer.
5.Temporarily connect a 3300uF or 2200uF capacitor across the existing
ones.
6.Switch on to to see if there is an improvement.
7.Remove the faulty component and solder in a replacement.
In my case it proved to be the one nearest the push on connectors and
the only one I had to hand was rated at 16 volts and physically larger
than the original, so I had to extend the leads slightly.
John
Millington has advised that when his radio had this fault he
noted that the 1000uF capacitor on the front display board was domed
/swollen and when this was replaced the radio once again worked well.